
Sometimes the best way is to just get started - and we will start by spinning up your very first cluster.
That’s correct - right on your laptop.
Word of warning - some familiarity with CLI tools is greatly useful here.
If you prefer video, I’ve got you covered
What is Kubernetes?
Kubernetes (often shortened to K8s) is a platform for running and managing your containerised applications (think Docker) at scale.
The beauty comes from declarative approach - you tell K8s what you want to run, and he takes cares of making sure your app will run.
If you want 5 copies (replicas) of your app running, Kubernetes will make sure there are 5 running.
When a copy of your application stops responding, Kubernetes automatically replaces it with a new copy.
When you’re rolling out a new version of your app, K8s gradually replaces old version with new one - making sure everything works on the way.
It also takes care of load balancing, distributing your app on multiple servers (nodes).
Magic.
Why run Kubernetes locally?
Kubernetes is complex. Yes it uses YAML files for configuration, but that doesn’t change the fact there’s a lot of going on.
Running locally helps you to have a safe playground. And save some money, probably.
I picked kind (Kubernetes In Docker) as it allows you to easily create a multi node cluster - simulating real live deployment.
Don’t be mistaken - everything you’ll be doing in Kind, can be done in real deployment.
Why YAML files?
YAML files allow you to keep track of what’s intended to be running on the cluster. How you want your cluster configured.
While you can go directly with Kubectl to make some changes - it’s not advisable.
In here we will start with Kubectl to get you going quickly, but soon enough will move to YAML files.
Here’s necessary tooling
- Docker go and download Docker Desktop for your machine, and install it.
- Kind - Kind is “Kubernetes in Docker”, your very own cluster
- Kubectl - Kubectl is the main tool you will use to interact with your cluster
Some optional tools to make your life easier
- VS Code - A code editor
- VS Code Kubernetes Extension - this extension helps a lot while working with Kubernetes
- K9s - a TUI application to manage Kubernetes cluster
Once you’ve got everything installed, let’s check if everything is installed correctly. Open terminal and type:
docker --version
kind --version
kubectl version
Create your first Kind cluster
If everything looks similar to my screenshots - let’s create your first cluster. In terminal type
kind create cluster
And watch how Kind prepares your first Node. Node is like a server running your application and we have two types:
- Control plane - a brain of the operation.
- Worker - where work actually happens
Once Kind reports back that it completed, issue some more commands:
kubectl cluster-info --context kind-kind
kubectl get nodes
Important: All commands you issue with Kubectl are run against current context (cluster). Always make sure you’re executing commands against right cluster.
First command shows basic information about current cluster, second lists nodes - we have only one.
First Deployment
Let’s deploy something! Issue command:
kubectl create deployment hello-node --image=registry.k8s.io/e2e-test-images/agnhost:2.53 -- /agnhost netexec --http-port=8080
Now don’t be scared - in practice you will apply YAML manifests to your cluster - so there won’t be a need for such long commands.
You can observe your app deployment run commands:
kubectl get deployment
You should within moments see ready 1/1
NAME         READY   UP-TO-DATE   AVAILABLE   AGE
hello-node   1/1     1            1           10s
Or you can check pods:
kubectl get pods
To see more details specs, check events:
kubectl get events
Now, if you would like to stop working, simply exit Docker. Or to destroy the cluster:
kind delete cluster
Multi Node Config
So far we were running a single node config. In reality you will have multiple nodes running.
so for start, let’s delete current cluster:
kind delete cluster
Save below file as config.yaml. This config file will tell Kind to create a cluster with 3 nodes: single control plane and two worker nodes.
kind: Cluster
apiVersion: kind.x-k8s.io/v1alpha4
nodes:
- role: control-plane
- role: worker
- role: worker
Create a new cluster with this command:
kind create cluster --config '<path to config.yaml>'
And now you should see three nodes:
kubectl get nodes

NAME                 STATUS   ROLES           AGE    VERSION
kind-control-plane   Ready    control-plane   104s   v1.34.0
kind-worker          Ready    <none>          94s    v1.34.0
kind-worker2         Ready    <none>          94s    v1.34.0
Let’s create another deployment - create file deployment.yaml. This time we will create 5 replicas for our deployment - that is we are going to have 5 copies of the app running:
apiVersion: apps/v1
kind: Deployment
metadata:
  name: nginx-deployment
  labels:
    app: nginx
spec:
  replicas: 5
  selector:
    matchLabels:
      app: nginx
  template:
    metadata:
      labels:
        app: nginx
    spec:
      containers:
      - name: nginx
        image: nginx:1.14.2
        ports:
        - containerPort: 80
Run command to deploy the nginx app:
kubectl apply -f '<path to deployment.yaml'
Let’s review deployment, notice 5/5:
kubectl get deployment

NAME               READY   UP-TO-DATE   AVAILABLE   AGE
nginx-deployment   5/5     5            5           2m39s
We can also review each individual pod in the deployment. Notice how distributed they are across different nodes:
kubectl get pods -o wide

NAME                               READY   STATUS    RESTARTS   AGE   IP           NODE           NOMINATED NODE   READINESS GATES
nginx-deployment-bf744486c-c44th   1/1     Running   0          31s   10.244.1.3   kind-worker2   <none>           <none>
nginx-deployment-bf744486c-ddv9z   1/1     Running   0          31s   10.244.1.2   kind-worker2   <none>           <none>
nginx-deployment-bf744486c-gzllt   1/1     Running   0          31s   10.244.1.4   kind-worker2   <none>           <none>
nginx-deployment-bf744486c-nk4mv   1/1     Running   0          31s   10.244.2.3   kind-worker    <none>           <none>
nginx-deployment-bf744486c-rwf44   1/1     Running   0          31s   10.244.2.2   kind-worker    <none>           <none>
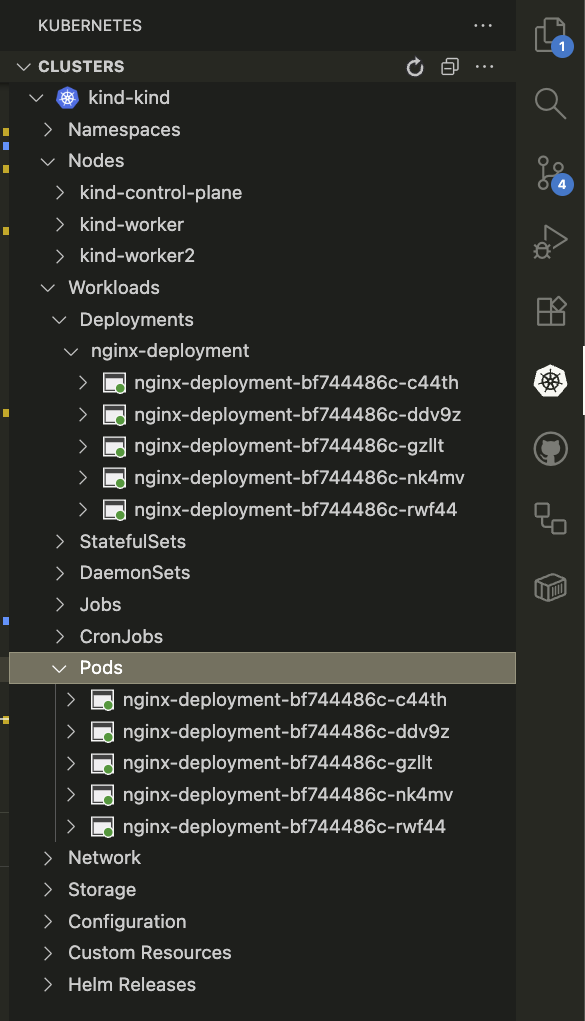
The VS Code Extension
VS Code Extension is a great tool to quickly manage your Cluster. You have a visual on deployment, pods - you can quickly review logs, or more detailed description.
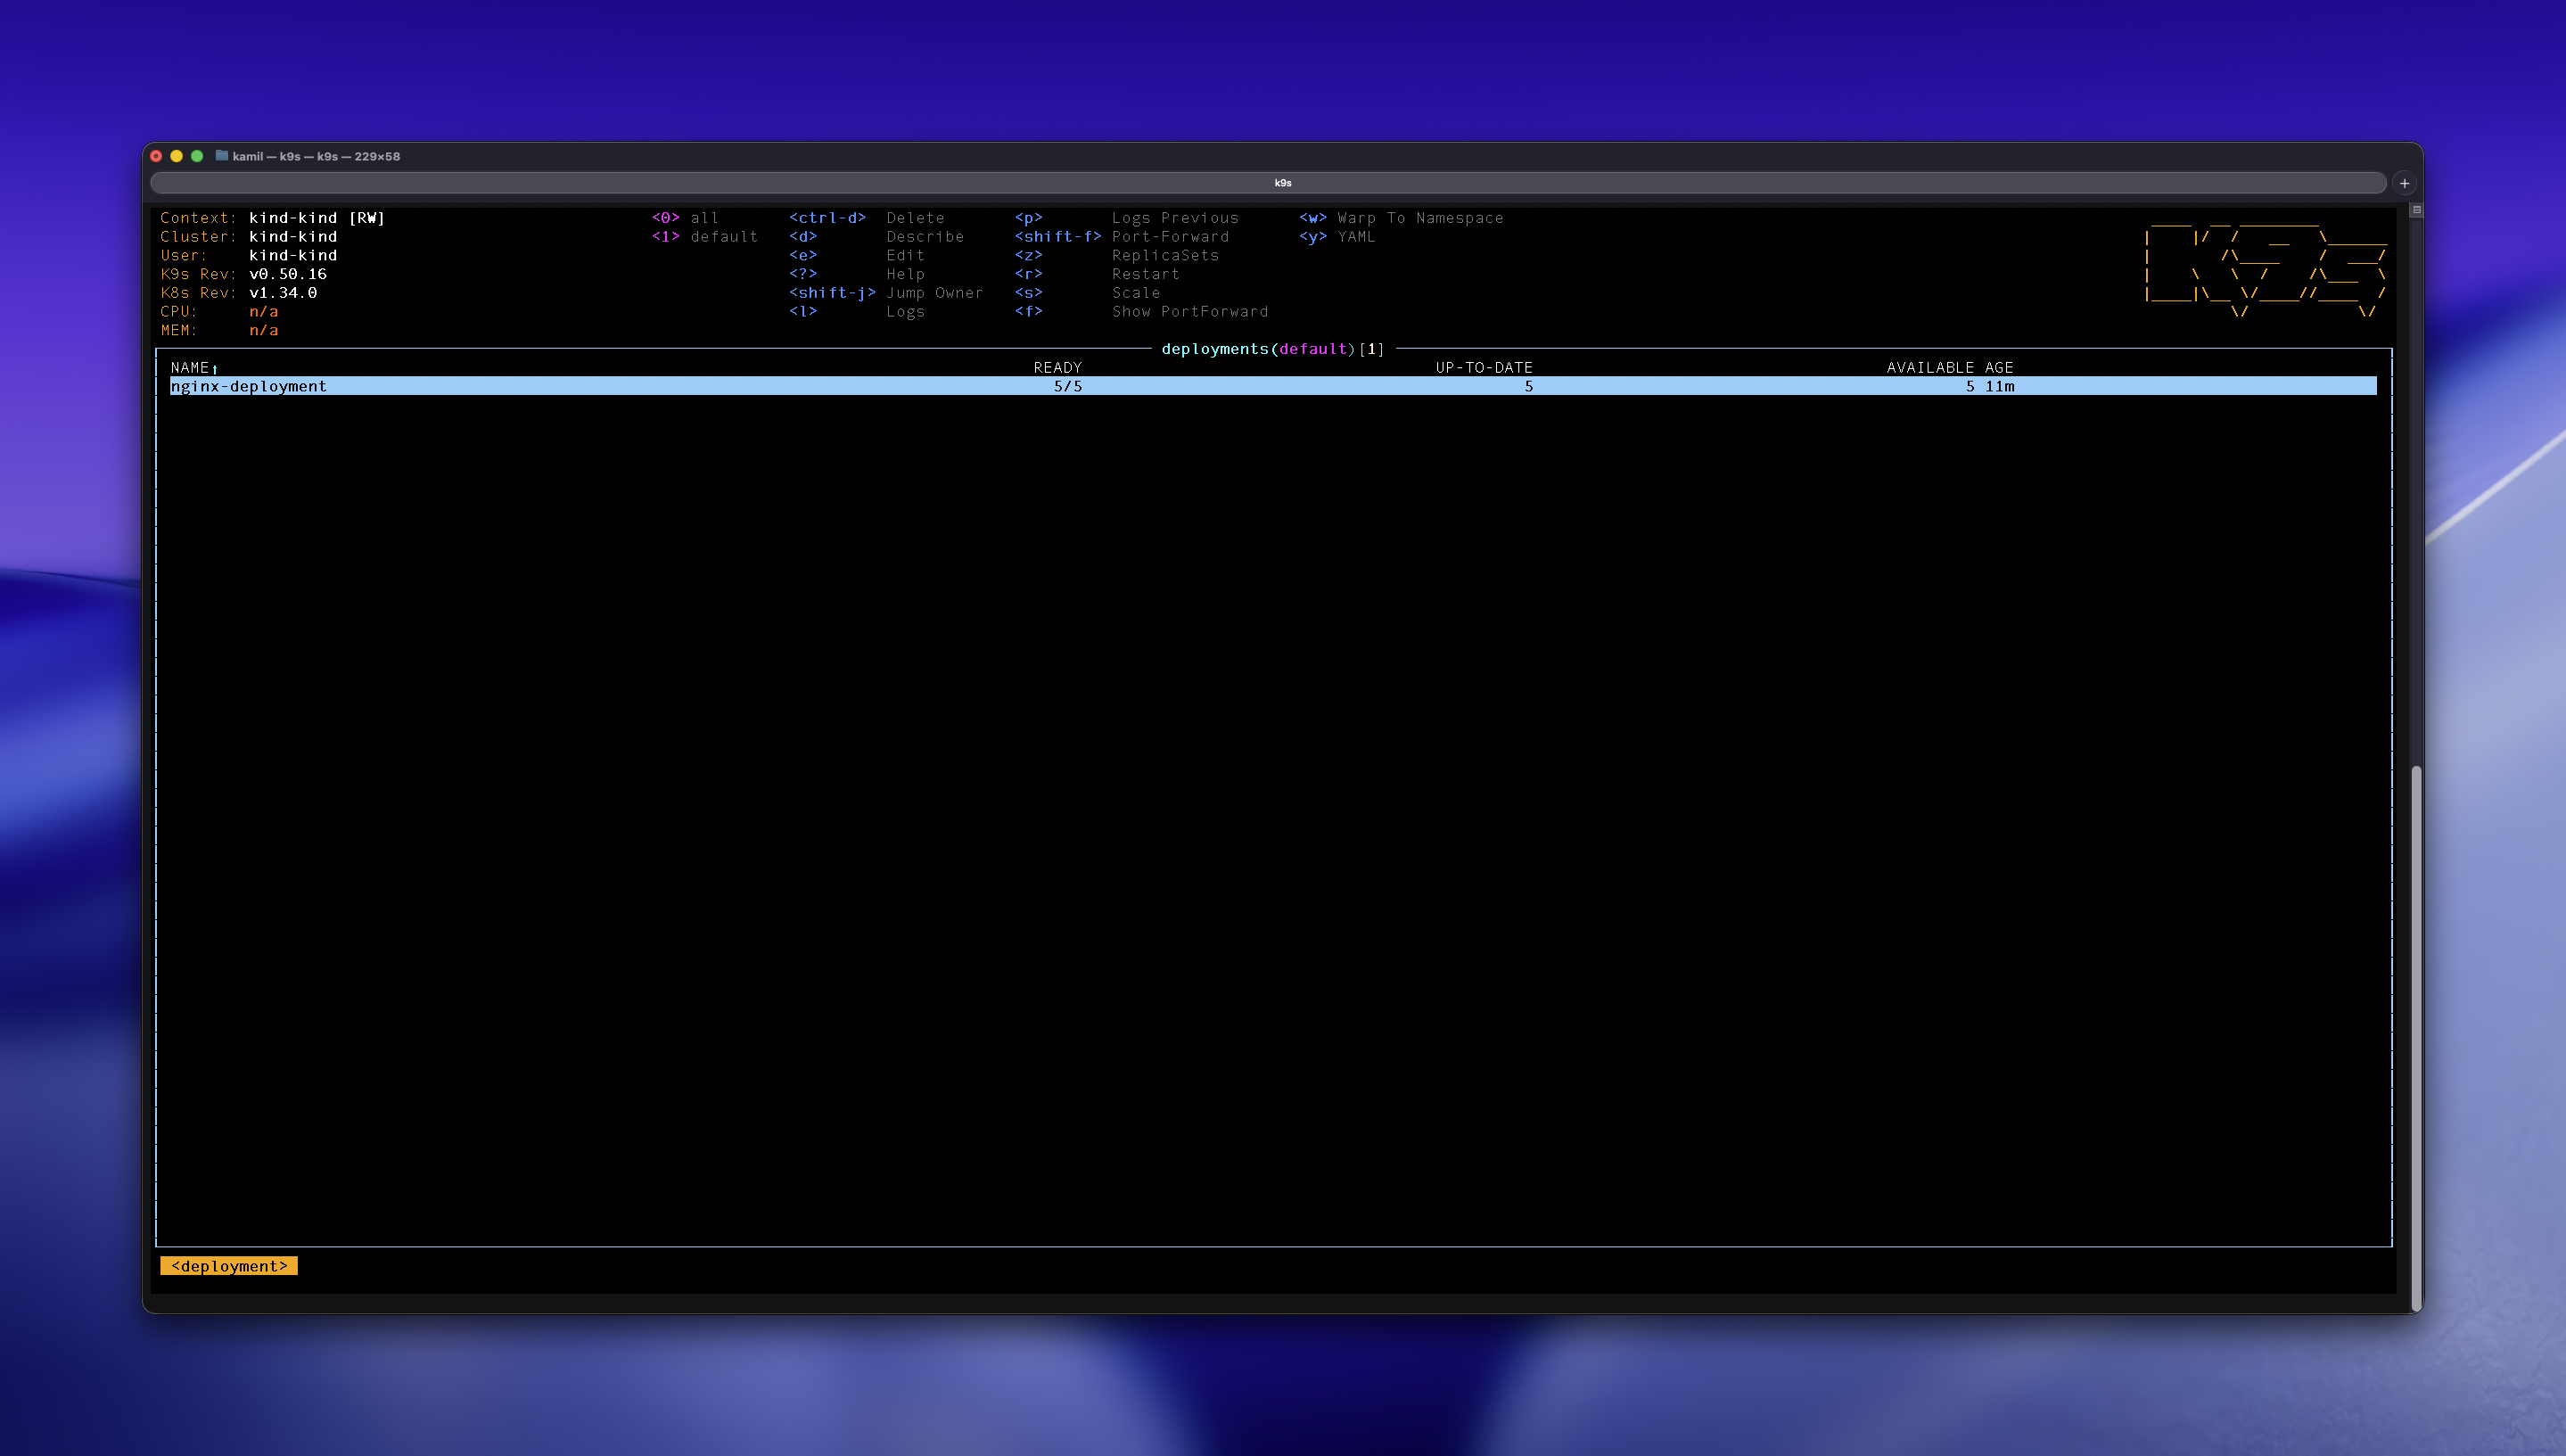
K9s tool
If TUI tools is your thing, K9s will help you greatly.
The hints on how to use the tool are at the top. On top of that:
: - helps you to change resource type. E.g. :deploy<tab> allows you to quickly jump to deployment
/ - fuzzy search, quickly filter for what information you need
Wrapping up
It was probably a lot to take, so let’s finish up for now.
To stop your cluster, you can simply exit Docker.
Or to stop your containers:
docker ps #to check containers
docker stop kind-worker
docker stop kind-worker2
docker stop kind-control-plane
You can always destroy cluster with:
kind delete cluster
Enjoyed? Check out my ProLetter
I have also some Premium Materials which might help you in your career.